
How the Hornchurch attacking play can be unstoppable
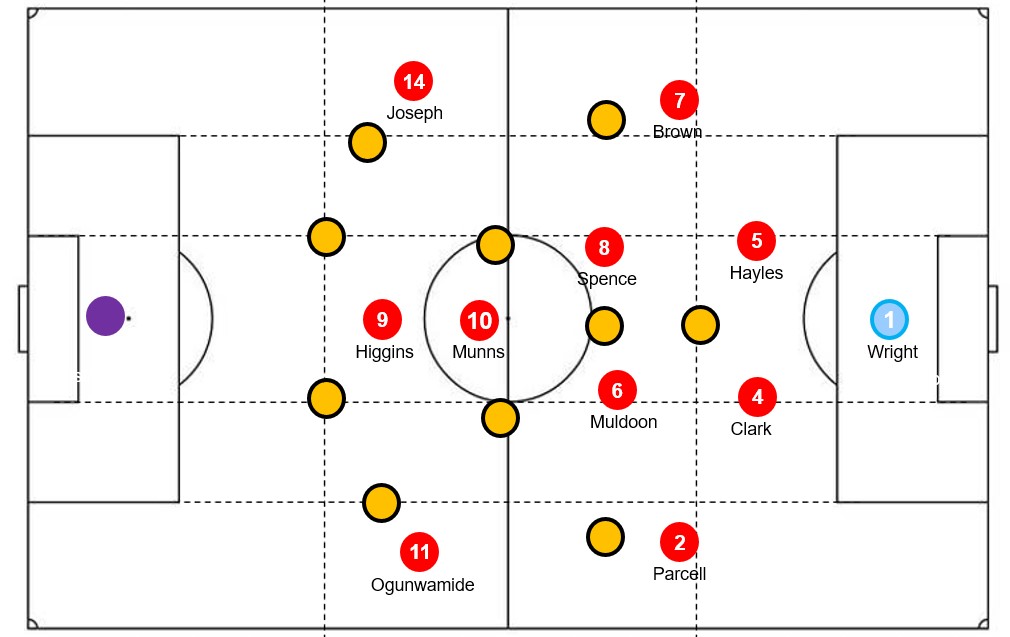
Hornchurch 2-1 Folkestone Invicta, Tuesday 6 December 2022
A few notes on AFC Hornchurch’s attacking play against Folkestone this week.
Hornchurch lost out in the play-off final to Cheshunt last season. And while Cheshunt are now in a National League South relegation scrap, Hornchurch look like candidates for automatic promotion from the Isthmian Premier.
A big part of that success, on Tuesday at least, is down to the Hornchurch attacking play, which I’ll go through in another quick overview of a team’s strategy, below.
Build up play: Hornchurch attacking play
They use simple patterns on the flanks in possession, getting the ball forward to suit the strengths of their players.
There was a point in the first half where it all looked predictable. But as a Hornchurch supporting friend pointed out; “Even when you know it’s coming you still have to stop it”.
Here’s how the Hornchurch attacking play works.
The left centre-back would bring the ball wide into the half-space. From here he had passing options both inside and wide.
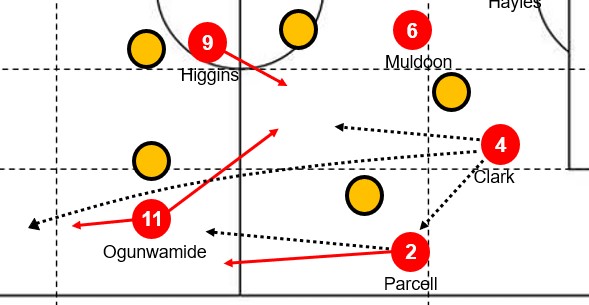
One option was to play long down the wing. Or if he was pressed he could play short to the full-back Mickey Parcell on the touchline.
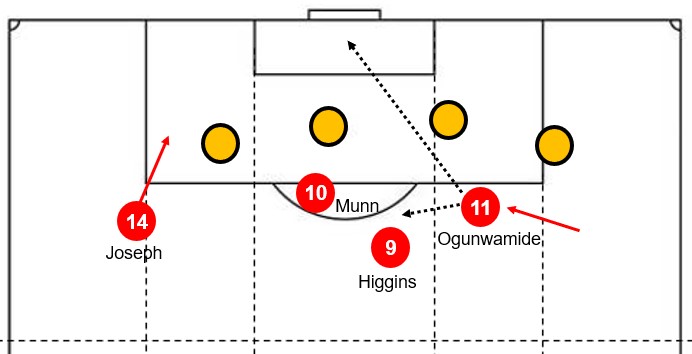
From his position outside the Folkestone full-back, Ola Ogunwamide could also drop to receive in the left half space.
If he did, that served as the trigger for the full-back to rush forward along the touchline. If the ball was played to the full-back instead, it would be Ogunwamide making the run forward.
Build-up play: Strong options in the middle
Simple enough. And it worked because of the speed of Ogunwamide against what was a high defensive line. Folkestone stepped up, with their defenders a few yards inside their own half.
But there is another option in the Hornchurch attacking play. It comes in the form of the immovable Sam Higgins in the middle of the pitch.
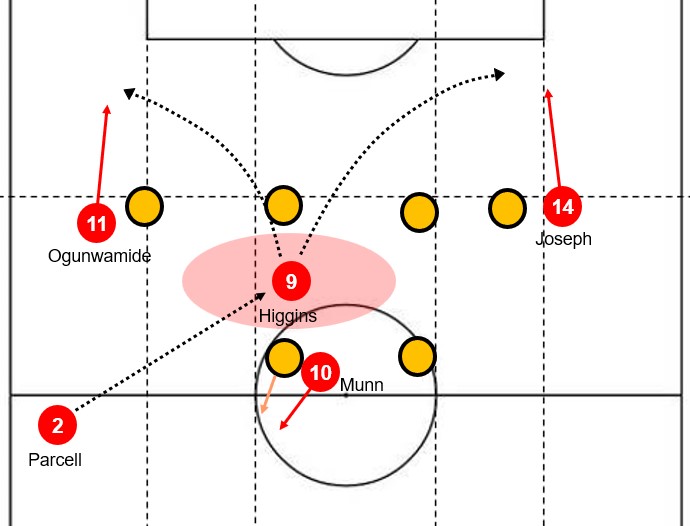
You would describe Higgins as having a “strong build”. He has no pace. That much is obvious. But what he can do is hold the ball up brilliantly, especially when receiving with his back to goal between the Folkestone defence and midfield lines. Higgins is excellent at protecting the ball, turning his man, and playing forward.
From there he can either thread the ball through the gaps in the defence, or loop the ball over the defenders to either flank. Either option gets Ogunwamide or Tobi Joseph into a footrace with the Folkestone full-back.
This was extremely effective on the day, and difficult to stop.
Final third: Speed of wingers
WIth the ball in the Folkestone third it would be down to the farside winger to get into the box along with either Jack Munns or even Higgins in the centre. Although by this point Higgins’ job tended to be done.
This did sometimes leave a gap in the centre, so support came from one of the central midfielders pushing up through the middle.
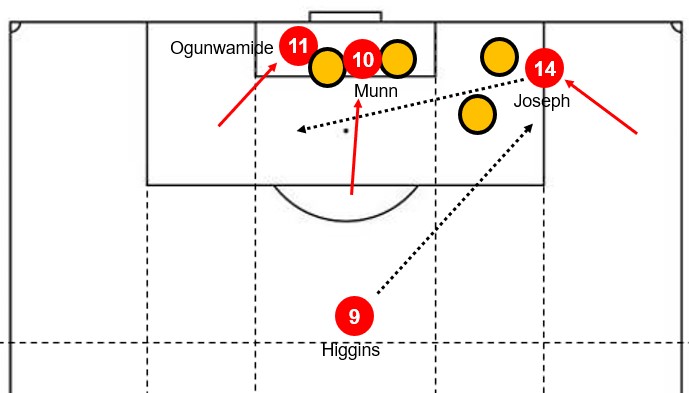
They could also look a bit flat arriving in the box. They sometimes overran the ball with no one occupying the second six-yard box in front of goal for the crosses Joseph would play from the right.
That limited chances on goal, particularly in the first half.
Second half: Switching roles
In the second half, Ogunwamide and Joseph switched wings. This allowed Ogunwamide to better make use what has become his signature move.
Like before, you can see it coming, but you still have to find a way to stop it.
It’s on the right wing that he can start wide then cut inside onto his stronger left foot. This is usually along the 18-yard line where he can either shoot or play the ball centrally in front of the box.
Joseph can do what he does on either side. Both wingers like to take on defenders. But while Joseph is a push-and-run type, racing past defenders and then using close control inside the box, Ogunwamide is more of a dribbler.
But it gives Hornhcurch several options in attack and gave Folkestone new headaches after the break. And all with Higgins, the playmaker, firmly in position in the centre.
Conclusions
This was just one game though. And given that Higgins does not always start, Hornchurch get results with other systems of play. Ogunwamide is sometimes used from the bench, with Liam Nash taking his place on the left.
But the Hornchurch attacking play is getting goals this season. A total of 48 so far. That’s 11 more than the next best. And unbeaten at home.
Like a lot of non-league divisions, the Isthmian Premier is difficult to get out of. The best way is to win the league, avoiding a repeat of play-off chaos. That’s the plan for Hornchurch. So far it’s working well.